For all our projects I had to enable JaCoCo reporting to send the code coverage reports to Sonar. This went fine for almost all projects, however some of them had 0% coverage.
Maven plugin looks like this:
<plugin>
    <groupId>org.jacoco</groupId>
    <artifactId>jacoco-maven-plugin</artifactId>
    <version>0.8.2</version>
    <executions>
        <execution>
            <goals>
                <goal>prepare-agent</goal>
            </goals>
        </execution>
        <execution>
            <id>report</id>
            <phase>test</phase>
            <goals>
                <goal>report</goal>
            </goals>
        </execution>
    </executions>
</plugin>
However if you have configured maven-surefire-plugin where you have a argLine then the JaCoCo argline will be overwritten.
Solution is to pass $argLine to the <argLine> so the JaCoCo args are appended:
<plugin>
    <groupId>org.apache.maven.plugins</groupId>
    <artifactId>maven-surefire-plugin</artifactId>
    <version>2.22.2</version>
    <configuration>
        <argLine>-Xmx1024m -Dproperty=value ${argLine}</argLine>
    </configuration>
</plugin>
My Dell Precisin 5530 laptop was not installing the bios update. In the GNOME GUI it was not showing any error and kept prompting to do a reboot.
On the CLI when doing a fwupdmgr update I was getting the following error:
[gokhanorhun@fedora ~]$ fwupdmgr update
Devices with no available firmware updates:
 • Dell WD15/TB16/TB18 wired Dock
 • KXG50ZNV1T02 NVMe TOSHIBA 1024GB
 • TPM
 • Thunderbolt Cable
 • Thunderbolt Dock
 • Thunderbolt host controller
╔══════════════════════════════════════════════════════════════════════════════╗
║ Upgrade System Firmware from 1.30.0 to 1.36.0?                               ║
╠══════════════════════════════════════════════════════════════════════════════╣
║ This stable release fixes the following issues:                              ║
║                                                                              ║
║ • This release contains security updates as disclosed in the Dell            ║
║ Security Advisory.                                                           ║
║                                                                              ║
║ Precision 5530 must remain plugged into a power source for the duration of   ║
║ the update to avoid damage.                                                  ║
╚══════════════════════════════════════════════════════════════════════════════╝
Perform operation? [Y|n]: y
Decompressing…           [                                       ] Less than one minute remaining…
/boot/efi does not have sufficient space, required 66.3 MB, got 65.2 MB
Apparently this has to do with having a dual boot with Windows and the /boot/efi partition was only 96MB.
I had to temprary move /boot/efi/EFI/Microsoft and /boot/efi/EFI/Dell to another location and then run the fwupdmgr update again.
[gokhanorhun@fedora ~]$ fwupdmgr update
Devices with no available firmware updates:
• Dell WD15/TB16/TB18 wired Dock
• KXG50ZNV1T02 NVMe TOSHIBA 1024GB
• TPM
• Thunderbolt Cable
• Thunderbolt Dock
• Thunderbolt host controller
╔══════════════════════════════════════════════════════════════════════════════╗
║ Upgrade System Firmware from 1.30.0 to 1.36.0?                               ║
╠══════════════════════════════════════════════════════════════════════════════╣
║ This stable release fixes the following issues:                              ║
║                                                                              ║
║ • This release contains security updates as disclosed in the Dell            ║
║ Security Advisory.                                                           ║
║                                                                              ║
║ Precision 5530 must remain plugged into a power source for the duration of   ║
║ the update to avoid damage.                                                  ║
╚══════════════════════════════════════════════════════════════════════════════╝
Perform operation? [Y|n]: y
Waiting…                 [***************************************] Less than one minute remaining…
Successfully installed firmware
Do not turn off your computer or remove the AC adapter while the update is in progress.
Devices with the latest available firmware version:
• UEFI dbx
An update requires a reboot to complete. Restart now? [y|N]:
After the update was successful I moved the /boot/efi/EFI/Microsoft and /boot/efi/EFI/Dell back to their original location.
I am using JBake for this blog and using the free tier of Circle CI which is configured with Git using a webhook.
This is the pipeline that deploy automatically after a git push.
# Use the latest 2.1 version of CircleCI pipeline process engine.
# See: https://circleci.com/docs/2.0/configuration-reference
version: 2.1

# Define a job to be invoked later in a workflow.
# See: https://circleci.com/docs/2.0/configuration-reference/#jobs
jobs:
  jbake-build:
    # Specify the execution environment. You can specify an image from Dockerhub or use one of our Convenience Images from CircleCI's Developer Hub.
    # See: https://circleci.com/docs/2.0/configuration-reference/#docker-machine-macos-windows-executor
    docker:
      - image: jbake/jbake:2.6.7
    # Add steps to the job
    # See: https://circleci.com/docs/2.0/configuration-reference/#steps
    steps:
      - checkout
      - run:
          name: "jbake build"
          command: "jbake -b"
      - persist_to_workspace:
          root: .
          paths:
            - "output"
  ftp-upload:
    docker:
      - image: com2ghz/ftp:latest
        environment:
            FTP_USER: $FTP_USER
            FTP_PW: $FTP_PW
    steps:
      - attach_workspace:
          at: /mnt
      - run:
          name: "Upload to site"
          shell: /bin/ash
          command: "ncftpput -R -v -u $FTP_USER -p $FTP_PW orhun.nl  /public_html /mnt/output/*"

# Invoke jobs via workflows
# See: https://circleci.com/docs/2.0/configuration-reference/#workflows
workflows:
  build-jbake-workflow:
    jobs:
      - jbake-build:
          filters:
            branches:
              only:
                - master
      - ftp-upload:
          requires:
            - jbake-build
The default behaviour of Spring Security is that all endpoints are secured by default.
In order to ignore authentication on spring-actuator endpoints you need to provide this bean:
  @Bean
  public WebSecurityCustomizer webSecurityCustomizer() {
    return (web) -> web.ignoring()
        .requestMatchers(new AntPathRequestMatcher("/actuator/**"));
  }
Source: https://spring.io/blog/2022/02/21/spring-security-without-the-websecurityconfigureradapter
On Windows I was trying to run a unit test in IntelliJ which was not able to run because the command was too long. IntelliJ was suggesting to use @argfile to shorten the command.
However when doing that I was getting this exception when running the test:
Exception in thread "main" java.lang.NoClassDefFoundError: org/junit/platform/engine/TestDescriptor
	at java.base/java.lang.Class.forName0(Native Method)
	at java.base/java.lang.Class.forName(Class.java:375)
	at com.intellij.rt.junit.JUnitStarter.getAgentClass(JUnitStarter.java:241)
	at com.intellij.rt.junit.JUnitStarter.prepareStreamsAndStart(JUnitStarter.java:222)
	at com.intellij.rt.junit.JUnitStarter.main(JUnitStarter.java:55)
Caused by: java.lang.ClassNotFoundException: org.junit.platform.engine.TestDescriptor
	at java.base/jdk.internal.loader.BuiltinClassLoader.loadClass(BuiltinClassLoader.java:641)
	at java.base/jdk.internal.loader.ClassLoaders$AppClassLoader.loadClass(ClassLoaders.java:188)
	at java.base/java.lang.ClassLoader.loadClass(ClassLoader.java:520)
	... 5 more
You can also use JAR manifest as command shortener, this did not work for me. Spring context was trying to start, but since this project was doing a lot reflection and resource loading, I was getting an exception that an resource was not found.
You might have too many dependencies causing a commandline command which is too long. Every dependency is added as classpath argument by it's absolute path. So if you have a long username your .m2 path will look like this:
C:\Users\LastnameFirstname\.m2\repository
I solved it by moving my .m2\repository to C:\.m2\r.
Changed the local repository path in my C:\Users\<name>\.m2\settings.xml
<settings xmlns="http://maven.apache.org/SETTINGS/1.0.0"
		  xmlns:xsi="http://www.w3.org/2001/XMLSchema-instance"
		  xsi:schemaLocation="http://maven.apache.org/SETTINGS/1.0.0 http://maven.apache.org/xsd/settings-1.0.0.xsd">

 <localRepository>C://.m2/r</localRepository>
...
</settings>
Verify your maven repository in IntelliJ Maven settings.
Docker compose file for oauth2-proxy.
version: "3"

services:
  oauth-proxy:
    image: quay.io/oauth2-proxy/oauth2-proxy:v7.6.0
    restart: always
    environment:
      OAUTH2_PROXY_CLIENT_ID: <clientid>
      OAUTH2_PROXY_CLIENT_SECRET: <secret>
      OAUTH2_PROXY_COOKIE_SECRET: agklqlf3hp577gan4dwcqhkdxymoxi8m
      OAUTH2_PROXY_OIDC_ISSUER_URL: <url>
      OAUTH2_PROXY_AUTH_LOGGING: true
      OAUTH2_PROXY_UPSTREAMS: static://202
      OAUTH2_PROXY_EMAIL_DOMAINS: <domain>
      OAUTH2_PROXY_WHITELIST_DOMAINS: <domain>
      OAUTH2_PROXY_COOKIE_DOMAINS: <domain>
      OAUTH2_PROXY_COOKIE_SECURE: false
      OAUTH2_PROXY_SCOPE: 'openid profile email'
      OAUTH2_PROXY_PROVIDER: oidc
      OAUTH2_PROXY_HTTP_ADDRESS: 0.0.0.0:4180
      OAUTH2_PROXY_PROVIDER_DISPLAY_NAME: "Oauth 2 Proxy"
      OAUTH2_PROXY_REVERSE_PROXY: true
      OAUTH2_PROXY_SHOW_DEBUG_ON_ERROR: true
      OAUTH2_PROXY_PASS_AUTHORIZATION_HEADER: true
      OAUTH2_PROXY_SET_AUTHORIZATION_HEADER: true
    ports:
      - "4180:4180"
    dns: 8.8.8.8
Traefik Middleware:
apiVersion: traefik.containo.us/v1alpha1
kind: Middleware
metadata:
  name: traefik-oauth2-auth-redirect
spec:
  forwardAuth:
    address: http://oauth2-proxy-service.namespace.svc.cluster.local:4180/
    trustForwardHeader: true
    authResponseHeaders:
      - X-Auth-Request-User
      - X-Auth-Request-Email
      - X-Auth-Request-Access-Token
      - Authorization
      - X-Auth-Request-Redirect
I was trying to start JFR on a production java application, however I was getting this error:
root@798db95bcd-2wnsk:/# jcmd 51 JFR.start filename=/tmp/myrecording.jfr
51:
com.sun.tools.attach.AttachNotSupportedException: Unable to open socket file /proc/51/root/tmp/.java_pid51: target process 51 doesn't respond within 10500ms or HotSpot VM not loaded
        at jdk.attach/sun.tools.attach.VirtualMachineImpl.<init>(VirtualMachineImpl.java:104)
        at jdk.attach/sun.tools.attach.AttachProviderImpl.attachVirtualMachine(AttachProviderImpl.java:58)
        at jdk.attach/com.sun.tools.attach.VirtualMachine.attach(VirtualMachine.java:207)
        at jdk.jcmd/sun.tools.jcmd.JCmd.executeCommandForPid(JCmd.java:113)
        at jdk.jcmd/sun.tools.jcmd.JCmd.main(JCmd.java:97)
The Java application runs in a Jar, within a Docker container in Kubernetes. De Java runs under a different user than root. Java does not care if you are root, it requires that you start JFR with the same user
as the user of the java process.
So in my case I was running the application with uer appuser:
su -c "$JAVA_HOME/bin/jcmd 51 JFR.start filename=/tmp/myrecording.jfr" -s /bin/sh appuser
So in the command above, 51 is the java pid which you can determine by calling jps
In order to dump a JFR file run this:
su -c "$JAVA_HOME/bin/jcmd 51 JFR.dump filename=/tmp/myrecording.jfr" -s /bin/sh appuser
To stop JFR:
su -c "$JAVA_HOME/bin/jcmd 51 JFR.stop name=51" -s /bin/sh appuser
To copy the jfr file from the Kubernetes pod to your local machine:
kubectl cp pod-name-798db95bcd-qzjtj:/tmp/myrecording.jfr ./myrecording.jfr -n mynamespace
Some kubectl commands I always forget:
Get the current kubectl context:
kubectl config current-context
Get all configured Kubernetes contexts:
kubectl config get-contexts
Set the current context:
kubectl config use-context my-context
More JFR stuff: https://docs.oracle.com/javacomponents/jmc-5-5/jfr-command-reference/diagnostic-command-reference.htm#resourceid-15322-48C8362A
Finally:
Good luck profiling with JDK Mission Control
I stumbled with an error when I tried to build an image from my local machine and got this error: failed to solve: error from sender: context canceled
My Dockerfile looked like this:
ARG REGISTRY
FROM $REGISTRY/node:20.9-alpine as build

WORKDIR /app

COPY . /app
The error:
$ docker compose build beheer-web
[+] Building 5.7s (7/13)                                                                                                                                                                   docker:default
 => [beheer-web internal] load .dockerignore                                                                                                                                                         0.0s
 => => transferring context: 34B                                                                                                                                                                     0.0s
 => [beheer-web internal] load build definition from Dockerfile                                                                                                                                      0.0s
 => => transferring dockerfile: 557B                                                                                                                                                                 0.0s
 => [beheer-web internal] load metadata for nginx:1.25.3-alpine                                                                                                          4.3s
 => [beheer-web internal] load metadata for node:20.9-alpine                                                                                                             4.9s
 => CANCELED [beheer-web internal] load build context                                                                                                                                                0.8s
 => => transferring context: 79.47MB                                                                                                                                                                 0.7s
 => [beheer-web stage-1 1/3] FROM nginx:1.25.3-alpine@sha256:f2802c2a9d09c7aa3ace27445dfc5656ff24355da28e7b958074a0111e3fc076                                            0.0s
 => [beheer-web build 1/5] FROM node:20.9-alpine@sha256:cb2301e2c5fe3165ba2616591efe53b4b6223849ac0871c138f56d5f7ae8be4b                                                 0.0s
failed to solve: error from sender: context canceled
The problem was because I tried copying the current directory into the Docker image
COPY . /app
Since this is an IntelliJ project, it tried to also copy the .idea directory which is causing the problem since the files are being used.
The problem is that Docker is throwing this error because there are files in used that we try to copy.
While it does not make sense to copy the .idea folder the solution is to create a .dockerignore file and exclude files and directories which is similar as a .gitignore file.
I also added some angular and NPM directories since we build the application while building the Docker image.
.dockerignore
.idea
node_modules
.angular
dist
Enable L2TP IPsec VPN on a EdgeRouter X:
configure

set firewall name WAN_LOCAL rule 30 action accept
set firewall name WAN_LOCAL rule 30 description ike
set firewall name WAN_LOCAL rule 30 destination port 500
set firewall name WAN_LOCAL rule 30 log disable
set firewall name WAN_LOCAL rule 30 protocol udp
set firewall name WAN_LOCAL rule 40 action accept
set firewall name WAN_LOCAL rule 40 description esp
set firewall name WAN_LOCAL rule 40 log disable
set firewall name WAN_LOCAL rule 40 protocol esp
set firewall name WAN_LOCAL rule 50 action accept
set firewall name WAN_LOCAL rule 50 description nat-t
set firewall name WAN_LOCAL rule 50 destination port 4500
set firewall name WAN_LOCAL rule 50 log disable
set firewall name WAN_LOCAL rule 50 protocol udp
set firewall name WAN_LOCAL rule 60 action accept
set firewall name WAN_LOCAL rule 60 description l2tp
set firewall name WAN_LOCAL rule 60 destination port 1701
set firewall name WAN_LOCAL rule 60 ipsec match-ipsec
set firewall name WAN_LOCAL rule 60 log disable
set firewall name WAN_LOCAL rule 60 protocol udp

set vpn ipsec ipsec-interfaces interface <id>

set vpn l2tp remote-access ipsec-settings authentication mode pre-shared-secret
set vpn l2tp remote-access ipsec-settings authentication pre-shared-secret <secret>
set vpn l2tp remote-access authentication mode local
set vpn l2tp remote-access authentication local-users username <username> password <secret>
set vpn l2tp remote-access client-ip-pool start 192.168.100.240
set vpn l2tp remote-access client-ip-pool stop 192.168.100.249
set vpn l2tp remote-access dns-servers server-1 <address>
set vpn l2tp remote-access dns-servers server-2 <address>
set vpn l2tp remote-access outside-address <address>
set vpn l2tp remote-access mtu <value>

commit ; save
Source: https://help.ui.com/hc/en-us/articles/204950294-EdgeRouter-L2TP-IPsec-VPN-Server
Open Powershell with Administrator rights.
List your existing installation:
wsl --list
Will print something like:
PS C:\Windows\system32> wsl --list
Windows Subsystem for Linux Distributions:
Ubuntu (Default)
Unregister:
wsl --unregister Ubuntu
Install again
wsl --install
Recently I reinstalled my Raspberry Pi where I was running Home Assistant, Pi hole and Unifi controller within Docker. This
was working fine for a while, until my SD card was corrupt.
Docker was running rootless, and apparently the problem with that is that Docker was only running when there is a user
session.
Steps to reproduce problem:
Solution:
You need to enable lingering:
sudo loginctl enable-linger $(whoami)
When you run your Unifi controller inside a Docker container
you might face the problem that your Unifi devices are stuck
adopting. The main cause might be that you are not running your HTTP port on 8080, which is the default.
I strongly advise to run on this port to prevent future problems with this.
Solution
SSH into each device using the IP address as shown under your
devices in your Unifi controller interface.
First of all, in your unifi controller interface set the Monitor ip address to the IP of your docker host.
In the GUI go to Settings>System>Advanced>Monitor IP Address. You can' t do this step afterwards because your devices won't be able ping the unifi-controller.
The username and password of your Unifi devices is ubnt / ubnt.
Use info to show the current status:
UAP-HD-IW-BZ.6.6.78# info

Model:       UAP-HD-IW
Version:     6.6.78.15404
MAC Address: 74:ac:b9:1a:58:f5
IP Address:  192.168.1.40
Hostname:    UAP-HD-IW
Uptime:      599 seconds
NTP:         Synchronized

Status:      Timeout (http://172.21.0.2:8080/inform)
UAP-HD-IW-BZ.6.6.78# set-inform http://192.168.1.45:8080/inform
You might get the following error:
$ ssh ubnt@192.168.1.47
Bad server host key: Invalid key length
Use this SSH command to temporary put your cryptography policies to LEGACY:
sudo update-crypto-policies --set LEGACY
After logging in you need to set-inform to http://<ip>:<port>/inform
UAP-HD-IW-BZ.6.0.19# set-inform http://192.168.1.45:9090/inform

Adoption request sent to 'http://192.168.1.45:9090/inform'.  Use the controller to complete the adopt process.
Afterwards put your cryptography policies back to DEFAULT:
sudo update-crypto-policies --set LEGACY
You should see your devices online again.

Error:
0/3 nodes are available: 1 node(s) had taint {com.docker.ucp.manager: }, that the pod didn't tolerate, 2 node(s) didn't match Pod's node affinity/selector.
Problem:
The application has spec.template.spec.nodeSelector that could not match with the nodes.
In my case it looked like this:
      nodeSelector:
        category: service
Solution:
I had to add a label to a node that matches with my nodeSelector
apiVersion: v1
kind: Node
metadata:
  name: <domain>
  uid: <uuid>
  resourceVersion: <version>
  creationTimestamp: <timestamp>
  labels:
    category: service
Error when trying to install nodejs with nvm.
AzureAD+OrhunGökhan@WinMINGW64 ~
$ nvm install 14.17.0
C:\Users\OrhunGökhan\AppData\Roaming\nvm could not be found or does not exist. Exiting.
Downloading node.js version 14.17.0 (64-bit)...
Error while creating C:\Users\OrhunGâ–’khan\AppData\Roaming\nvm\v14.17.0\node64.exe - open C:\Users\OrhunGâ–’khan\AppData\Roaming\nvm\v14.17.0\node64.exe: The system cannot find the path specified.
Could not download node.js v14.17.0 64-bit executable.
This is caused by a special character or a space in your username. Since my computer is managed by Azure, I am not able to change it. This is also the reason why I never put special characters in files and directories.
Set the nvm root command line
Set the nvm root using double quotes.
AzureAD+OrhunGökhan@Win MINGW64 ~
$ nvm root "C:\Users\OrhunGökhan\AppData\Roaming\nvm"
Now doing a nvm install
AzureAD+OrhunGökhan@Win MINGW64 ~
$ nvm install 14.17.0
Downloading node.js version 14.17.0 (64-bit)...
Complete
Creating C:\Users\OrhunGökhan\AppData\Roaming\nvm\temp

Downloading npm version 6.14.13... Complete
Installing npm v6.14.13...

Installation complete. If you want to use this version, type

nvm use 14.17.0
If you get a `exit status 1: Access is denied`, then you need to run the terminal as Administrator.
Problem
After installing Fedora 34, I was getting an error with Virtualbox that the kernel driver was not installed.
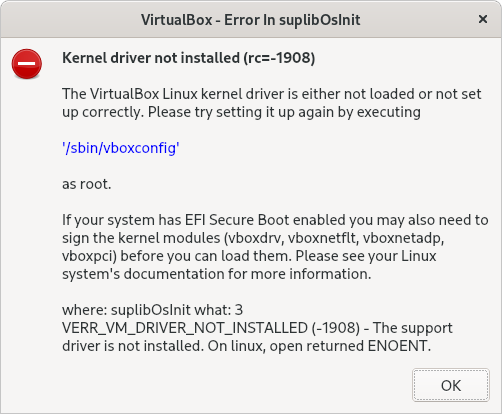
Solution
Try restarting the virtual box driver:
systemctl restart vboxdrv
You might get an error:
[gokhan@fedora]~% systemctl restart vboxdrv
Job for vboxdrv.service failed because the control process exited with error code.
See "systemctl status vboxdrv.service" and "journalctl -xeu vboxdrv.service" for details.
[gokhan@fedora]~%
[gokhan@fedora]~% systemctl status vboxdrv.service
× vboxdrv.service - VirtualBox Linux kernel module
     Loaded: loaded (/usr/lib/virtualbox/vboxdrv.sh; enabled; vendor preset: disabled)
     Active: failed (Result: exit-code) since Thu 2021-10-28 10:55:57 CEST; 8s ago
    Process: 21590 ExecStart=/usr/lib/virtualbox/vboxdrv.sh start (code=exited, status=1/FAILURE)
        CPU: 333ms

Oct 28 10:55:57 fedora vboxdrv.sh[21590]: vboxdrv.sh: Building VirtualBox kernel modules.
Oct 28 10:55:57 fedora vboxdrv.sh[21626]: Building VirtualBox kernel modules.
Oct 28 10:55:57 fedora vboxdrv.sh[21653]: This system is currently not set up to build kernel modules.
Oct 28 10:55:57 fedora vboxdrv.sh[21653]: Please install the Linux kernel "header" files matching the current kernel
Oct 28 10:55:57 fedora vboxdrv.sh[21653]: for adding new hardware support to the system.
Oct 28 10:55:57 fedora vboxdrv.sh[21653]: The distribution packages containing the headers are probably:
Oct 28 10:55:57 fedora vboxdrv.sh[21653]:     kernel-devel kernel-devel-5.14.13-200.fc34.x86_64
Oct 28 10:55:57 fedora systemd[1]: vboxdrv.service: Control process exited, code=exited, status=1/FAILURE
Oct 28 10:55:57 fedora systemd[1]: vboxdrv.service: Failed with result 'exit-code'.
Oct 28 10:55:57 fedora systemd[1]: Failed to start VirtualBox Linux kernel module.
In my situation I was missing the linux kernel headers. So I had to install them
[gokhan@fedora]~% dnf install kernel-devel kernel-devel-5.14.13-200.fc34.x86_64
After installation of headers, restart the virtual box service again
[gokhan@fedora]~% systemctl restart vboxdrv
Testing connectivity with openssl cli using s_client. We are making a TCP connection.
Prerequisite
You need to have openssl installed on your machine.
Testing TLS connection of google.com:
openssl s_client -connect google.com:443
CONNECTED(00000003)
depth=2 C = US, O = Google Trust Services LLC, CN = GTS Root R1
verify return:1
depth=1 C = US, O = Google Trust Services LLC, CN = GTS CA 1C3
verify return:1
depth=0 CN = *.google.com
verify return:1
---
Certificate chain
 0 s:CN = *.google.com
   i:C = US, O = Google Trust Services LLC, CN = GTS CA 1C3
 1 s:C = US, O = Google Trust Services LLC, CN = GTS CA 1C3
   i:C = US, O = Google Trust Services LLC, CN = GTS Root R1
 2 s:C = US, O = Google Trust Services LLC, CN = GTS Root R1
   i:C = BE, O = GlobalSign nv-sa, OU = Root CA, CN = GlobalSign Root CA
---
Server certificate
-----BEGIN CERTIFICATE-----
<truncated certificate content>
-----END CERTIFICATE-----
subject=CN = *.google.com

issuer=C = US, O = Google Trust Services LLC, CN = GTS CA 1C3

---
No client certificate CA names sent
Peer signing digest: SHA256
Peer signature type: ECDSA
Server Temp Key: X25519, 253 bits
---
SSL handshake has read 6661 bytes and written 384 bytes
Verification: OK
---
New, TLSv1.3, Cipher is TLS_AES_256_GCM_SHA384
Server public key is 256 bit
Secure Renegotiation IS NOT supported
Compression: NONE
Expansion: NONE
No ALPN negotiated
Early data was not sent
Verify return code: 0 (ok)
---
1. Putting a https:// in the front will give you this error
openssl s_client -connect https://google.com
140505260148544:error:2008F002:BIO routines:BIO_lookup_ex:system lib:crypto/bio/b_addr.c:730:Servname not supported for ai_socktype
connect:errno=0
The reason for that is because you want to make a TLS handshake and not initiating a https:// call.
2. Forgetting the port number:
When making a TCP connection, you must provide a valid hostname or ip adress including the port number. You can't initiate a connection without a port number.
If you would do `openssl s_client -connect google.com`, it will hang forever.
The mistake that is been made is that you might get confused with HTTP protocol which hides common port numbers.
So http://google.com is actually http://google.com:80.
and
https://google.nl is translated to https://google.com:443
Problem:
Can't connect with Kafka which is running locally in Docker using image https://hub.docker.com/r/bitnami/kafka/.
Getting this error from Spring Boot:
11:29:01.020 [kafka-admin-client-thread | adminclient-1] WARN  o.apache.kafka.clients.NetworkClient - [AdminClient clientId=adminclient-1] Error connecting to node 7b125d0acb0d:9092 (id: 1001 rack: null)
java.net.UnknownHostException: 7b125d0acb0d
Where 7b125d0acb0d is the docker container hostname where I'm running Kafka.
Solution:
Specify environment variable:
KAFKA_CFG_ADVERTISED_LISTENERS=PLAINTEXT://127.0.0.1:9092
In an array:
const numbers = [1, 2 ,3 4];
const myNewArray = [...numbers, 5 , 6, 7];

console.log(myNewArray); //prints [1, 2, 3, 4, 5, 6, 7]
In a JSON object
const person = {
  name: 'Gokhan'
}

const otherPerson = {
  ...person,
  age: 31
}
console.log(otherPerson);//prints {name: 'Gokhan', age: 31}
(similar to Java varargs:
const glueNames = (...names) =>  names.map((elem, i) => {
  return {
    index: i,
    name: elem,
    nameCharacterCount: elem.length
  }
});

const out = glueNames("Gokhan", "Orhun", "Awesomeguy");
console.log(JSON.stringify(out));
//Will print the following array:
[
  {
    "index": 0,
    "name": "Gokhan",
    "nameCharacterCount": 6
  },
  {
    "index": 1,
    "name": "Orhun",
    "nameCharacterCount": 5
  },
  {
    "index": 2,
    "name": "Awesomeguy",
    "nameCharacterCount": 10
  }
]
Good to know how Javascript takes care of reference primitive types
Primitive type:
const one = 1;
const copyOne = one;
Reference type for objects:
const person = {
  name: 'Loki'
};
const refPerson = person;

person.name = 'Tom';

console.log(refPerson.name);// prints 'Tom'
Same object, this time using the spread operator that makes a copy instead of a reference:
const person = {
  name: 'Loki'
};
const refPerson = {...person};

person.name = 'Tom';

console.log(refPerson.name);// prints 'Loki'
Fun fact: Loki is my cat.
As a Java developer Python amazes me how things can be done stupid simple.
Try to reverse a string in java:
    public static void main(String[] args) {
        String mytext = "abcdefg";
        StringBuilder result = new StringBuilder();
        for (int i = mytext.length(); i > 0; i--) {
            result.append(mytext.charAt(i-1));
        }
        System.out.println(result);
    }
Do it in Python:
mytext = "abcdefg"[::-1]
print(mytext)
The array indexing and slicing explained:
| Value | Explaination | |
| "abcdefg"[5] | "f" | Get the element on the 5th index number |
| "abcdefg"[2:] | "cdefg" | Slice the array from index 2 to the end |
| "abcdefg"[:2] | "ab" | Slice the array to index 2(exclusive) |
| "abcdefg"[1:4] | "bcd" | Get all elements starting from index 1 to index 4(exclusive) |
| "abcdefg"[2:7:2] | "ceg" | Get all elements starting from index 1 to index 7(exclusive), with steps of 2 |
| "abcdefg"[::2] | "aceg" | From the beginning to the end, take steps of 2 |
| "abcdefg"[::-1] | "gfedcba" | Take steps of -1 which actually iterates in reverse order. |
SDKMAN! does not distribute any Oracle JDK anymore. I think they stopped providing it for a while now(see their Medium article). I am used with the way of having multiple JDK versions managed by SDKMAN! and just switch between version using one command.
For my current project I have to use a certain Oracle JDK version, which is been installed locally on my machine, but I want to have it managed by SDKMAN!. Fortunately you can add your local JDK version by using the local install feature:
sdk install java 10-zulu /Library/Java/JavaVirtualMachines/zulu-10.jdk/Contents/Home
More info: SDKMAN! Local installation
Like every programming language Python basic collections exists of the following types:
List:
Storing unordered a sequence of multiple items of data like strings, integers etc.
#Initialization
my_list = [123, 'abc', 'hello']

#Add an item
my_list.append('world')

#Print the list contents
print(my_list)
#[123, 'abc', 'hello', 'world']

#Print the second one
print(my_list[1])
#abc

#Reassign the second
my_list[1] = 'Foo'

#Print the list contents
print(my_list)
#[123, 'Foo', 'hello', 'world']

#Print the size
print(len(mylist))
#4

#Get the index of an item
mylist.index('hello')
#2
Dictionary
Storing an unordered sequence of key value pairs
#Initialization
my_dict = {'a': 344, 34:'Foo', 'b': 'Bar'}

#Get the entry with key 'b'
my_dict.get('b')
#Bar

#Add or update the entry with key 'b'
my_dict.update({'b': 123})

#Print contents
print(my_dict)
#{'a': 344, 34: 'Foo', 'b': 123}
Tuple
An immutable unordered sequence of items
#Initialization
my_tuple = (1, 222, 1, 'hello', 'world', 'hello', 'hello')

#Get the number of occurence of item 'hello'
my_tuple.count('hello')
#3

#Get the index of the first occurence of 'hello'
my_tuple.index('hello')
#3
Set
An immutable unordered unique sequence of items
#Initialization
my_set = set()

#Add items
my_set.add(1)
my_set.add(222)
my_set.add('Hello')
my_set.add('Hello')
my_set.add('Hello')

#Print contents
print(my_set)
#{1, 222, 'Hello'}

#Add a sequence
my_set.update([5, 'Wow'])

#Print contents
print(my_set)
#{1, 222, 5, 'Hello', 'Wow'}

#Remove item
my_set.remove('Hello')

#Print contents
print(my_set)
#{1, 222, 5, 'Wow'}
Mutability of built-in Pyton data types
| Type | Description | Immutable |
| bool | Boolean value | Yes |
| int | integer | Yes |
| float | floating point number | Yes |
| list | mutable sequence of objects | No |
| tuple | immutable sequence of objects | Yes |
| str | Character string | Yes |
| set | unordered set of distinct objects | No |
| frozenset | immutable variant of set | Yes |
| dict | associative key value mapping | No |
It suprises me that some fellow developers that still struggle installing some development kits like Java JDK, Maven. It might be a pain in the ass to find your right piece of software for yourLinux distribution. How many times did you had a bug, or you were missing some feature that is released in a newer version but yet it was not available in your repo?
Especially when you need to be able to switch between versions because because of multiple projects you have to find a way to manage these multiple versions.
The moments when Maven could not build your project because you were using JDK8 instead of 11. I'm not only talking about Java, but also with tools like Maven, Gradle, Kotlin etc.
Background:
When installing Java JDK on Linux by using your package manager of your OS, you might encounter some difficulties. Finding the right version is one of the struggles, but if you install multiple versions, you have to tell your OS which version you prefer to use. You would do this by configuring the update-alternatives. Besides that, you have to modify your $JAVA_HOME environment variable. Everytime you want to switch versions, you have to configure update-alternatives and change your $JAVA_HOME. And everytime you are Googling how to switch those damn versions.
SDKMAN! comes to the resque!
"SDKMAN! is a tool for managing parallel versions of multiple Software Development Kits on most Unix based systems. It provides a convenient Command Line Interface (CLI) and API for installing, switching, removing and listing Candidates." SDKMAN
I am lazy. I am simple. I am using SDKMAN. Simply because the installation is just executing 1 line of code
$ curl -s "https://get.sdkman.io" | bash
The installation instructions are here.
I mean, it is so easy. Do you want to know what versions of JDK you can install|
Retrieve the list of available JDK.
gokhan@DESKTOP-0VOK5ER:~$ sdk list java
==== BROADCAST =================================================================
* 2019-06-24: Gradle 5.5-rc-4 released on SDKMAN! #gradle
* 2019-06-19: Kotlin 1.3.40 released on SDKMAN! #kotlin
* 2019-06-19: Springboot 2.1.6.RELEASE released on SDKMAN! #springboot
================================================================================
================================================================================
Available Java Versions
================================================================================
 Vendor        | Use | Version      | Dist    | Status     | Identifier
--------------------------------------------------------------------------------
 AdoptOpenJDK  |     | 12.0.1.j9    | adpt    |            | 12.0.1.j9-adpt
               |     | 12.0.1.hs    | adpt    |            | 12.0.1.hs-adpt
               |     | 11.0.3.j9    | adpt    |            | 11.0.3.j9-adpt
               |     | 11.0.3.hs    | adpt    |            | 11.0.3.hs-adpt
               |     | 8.0.212.j9   | adpt    |            | 8.0.212.j9-adpt
               |     | 8.0.212.hs   | adpt    |            | 8.0.212.hs-adpt
 Amazon        |     | 11.0.3       | amzn    |            | 11.0.3-amzn
               |     | 8.0.212      | amzn    |            | 8.0.212-amzn
 Azul Zulu     |     | 12.0.1       | zulu    |            | 12.0.1-zulu
               |     | 11.0.3       | zulu    |            | 11.0.3-zulu
               |     | 10.0.2       | zulu    |            | 10.0.2-zulu
               |     | 9.0.7        | zulu    |            | 9.0.7-zulu
               |     | 8.0.212      | zulu    |            | 8.0.212-zulu
               |     | 7.0.222      | zulu    |            | 7.0.222-zulu
               |     | 6.0.119      | zulu    |            | 6.0.119-zulu
 Azul ZuluFX   |     | 11.0.2       | zulufx  |            | 11.0.2-zulufx
               |     | 8.0.202      | zulufx  |            | 8.0.202-zulufx
 BellSoft      |     | 12.0.1       | librca  |            | 12.0.1-librca
               |     | 11.0.3       | librca  |            | 11.0.3-librca
               |     | 8.0.212      | librca  |            | 8.0.212-librca
 GraalVM       |     | 19.0.2       | grl     |            | 19.0.2-grl
               |     | 19.0.0       | grl     |            | 19.0.0-grl
               |     | 1.0.0        | grl     |            | 1.0.0-rc-16-grl
 Java.net      |     | 14.ea.2      | open    |            | 14.ea.2-open
               |     | 13.ea.26     | open    |            | 13.ea.26-open
               |     | 12.0.1       | open    |            | 12.0.1-open
               |     | 11.0.2       | open    |            | 11.0.2-open
               |     | 10.0.2       | open    |            | 10.0.2-open
               |     | 9.0.4        | open    |            | 9.0.4-open
 SAP           |     | 12.0.1       | sapmchn |            | 12.0.1-sapmchn
               |     | 11.0.3       | sapmchn |            | 11.0.3-sapmchn
================================================================================
Use the Identifier for installation:

    $ sdk install java 11.0.3.hs-adpt
================================================================================
For example we want to install OpenJDK 12.0.1
gokhan@DESKTOP-0VOK5ER:~$ sdk install java 12.0.1-open

Downloading: java 12.0.1-open

Repackaging Java 12.0.1-open...

Done repackaging...

Installing: java 12.0.1-open
Done installing!


Setting java 12.0.1-open as default.
To use java 12.0.1 as default:
sdk default java 12.0.1-open
List all available canidates:
gokhan@DESKTOP-0VOK5ER:~$ sdk list

================================================================================
Available Candidates
================================================================================
q-quit                                  /-search down
j-down                                  ?-search up
k-up                                    h-help

--------------------------------------------------------------------------------
Ant (1.10.1)                                             https://ant.apache.org/

Apache Ant is a Java library and command-line tool whose mission is to drive
processes described in build files as targets and extension points dependent
upon each other. The main known usage of Ant is the build of Java applications.
Ant supplies a number of built-in tasks allowing to compile, assemble, test and
run Java applications. Ant can also be used effectively to build non Java
applications, for instance C or C++ applications. More generally, Ant can be
used to pilot any type of process which can be described in terms of targets and
tasks.

                                                               $ sdk install ant
--------------------------------------------------------------------------------

...
...
...
Find more about the usage on the SDKMAN! website.
Unfortunately it does not provide NodeJS. You could use NVM for that
Docker runs well on Linux, but in Windows 10 it will run inside a Hyper-V container. So sometimes when you try to do Docker things, it can have it's side effects on Windows.
I tried to run a Docker container on Windows using the Git Bash terminal and it gave me this error:
$ docker run -it debian:jessie
the input device is not a TTY.  If you are using mintty, try prefixing the command with 'winpty'
Note that this is not a specific Docker problem but about the Terminal emulator.
Just like suggested, if you would prefix the command with 'winpty', then the command will execute properly:
$ winpty docker run -it debian:jessie
root@26bbdfcf3d68:/#
So what's the problem then?
It's all about theWindows terminal emulator you selected during the installation of Git.
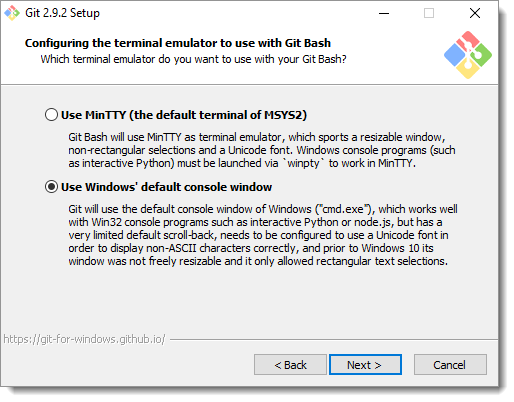
Just select the MinTTY terminal. Keep in mind that the MinTTY terminal emulator is not compatible with Windows console programs. Although you could use cmd or Powershell for Windows console programs.
There is a Dutch saying: "Bij de loodgieter lekt de kraan", which literally means "The tap is leaking at the plumbers home"
My security camera records pictures and video's into my NAS server. One in a while I have to truncate the directory because it's not accessible anymore through CIFS. Within 3 months there are more than 100k files. I do this manually because I'm lazy.
Usually you will go away with just executing the rm command. But with a huge number of files you get this message:
root@nas:/mnt/Data # rm -rf dvr/*
/bin/rm: Argument list too long.
The reason you get this message is because it's a kernel limitation. You can find out the maximum number of arguments that your kernel supports with this command:
getconf ARG_MAX
The solution
Use a for loop within the current directory:
for f in *.png; do rm "$f"; done
Use find:
#To delete .png files within the current directory
find . -name ".png" -exec rm {} +

#Delete everything within the current directory
find . -name ".png" -exec rm {} +
Source: Stackoverflow
TCPMon is a good TCP/IP tool to intercept the traffic that is being passed and shows the payload of the traffic. Sometimes when you are passing a cookie, or some other meta data you want to be sure if everything is being passed correctly. The tool also allows to simulate a slow connection. Which is ideal to reproduce timeout and/or performance issues.
TCPMon is not supported anymore but it is still one of the most populair tools out here. If you have a better alternative, feel free to mention them.
You can install TCPMon in IntelliJ as a plugin and it will appear in your toolbar.
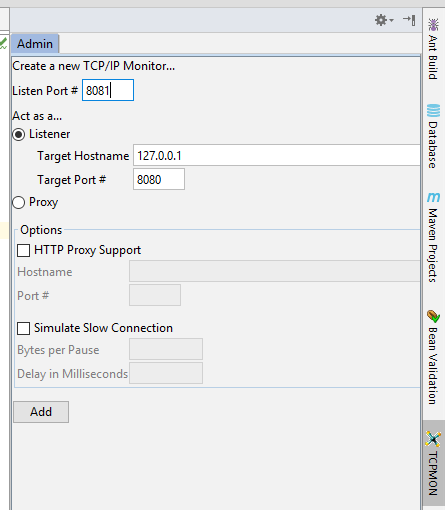
Steps:
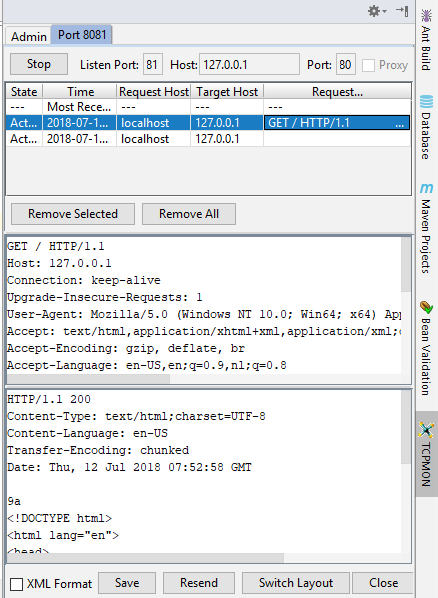
Now when you make requests to port 8081, it will redirect to 127.0.0.1:8080. You will see the following output
If you were familiair with Eclipse you know that when you would save java class it will build automatically. With IntelliJ you don't have to spam the CTRL + S combination anymore because it will save automatically but there is only one problem. Your class will not be compiled.
Some developers prefer to compile manually because of the performance of the IDE but it can trick you into weird behavior if you forget it once. Especially when developing microservices where you are running 5 instances of IntelliJ.
IntelliJ has the option to build project automatically, BUT it only works while not running / debugging. How sad that is.
I was developing a Spring Boot application using Spring Boot Developer Tools which comes with a neat feature where classes are being reloaded. The dev tools only restarts the ServletContext within seconds. The main problem was that it only happens when the class is being compiled. So in Intellij you had to trigger a build yourself while in Eclipse when you would save your class, it will compile automatically even when running.
In IntelliJ it is possible to override this behavior to build automatically even when the application is running.
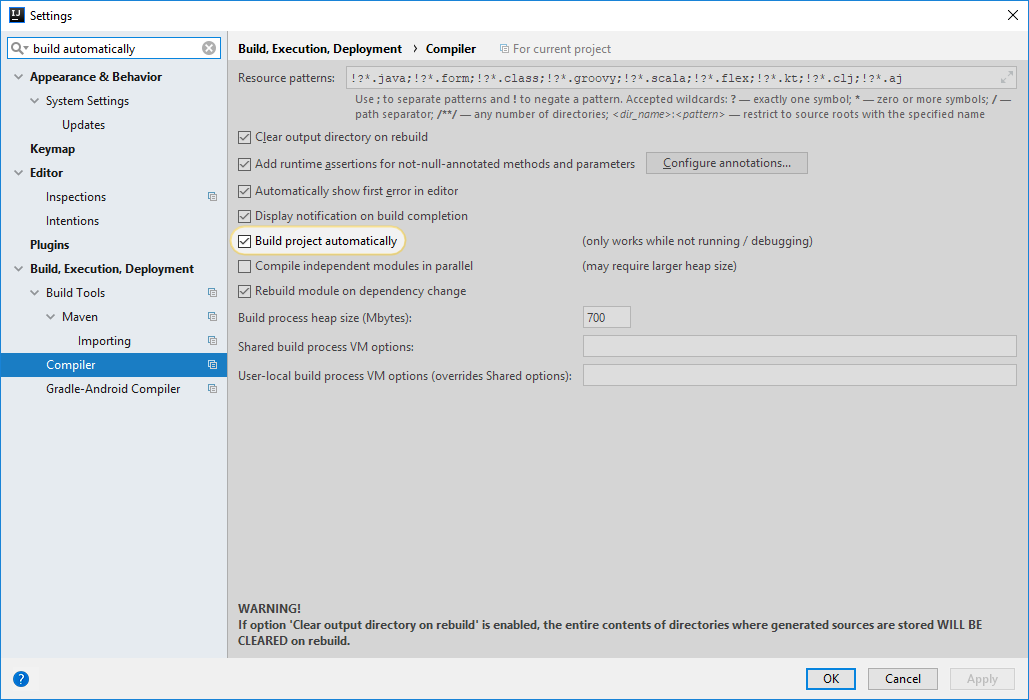
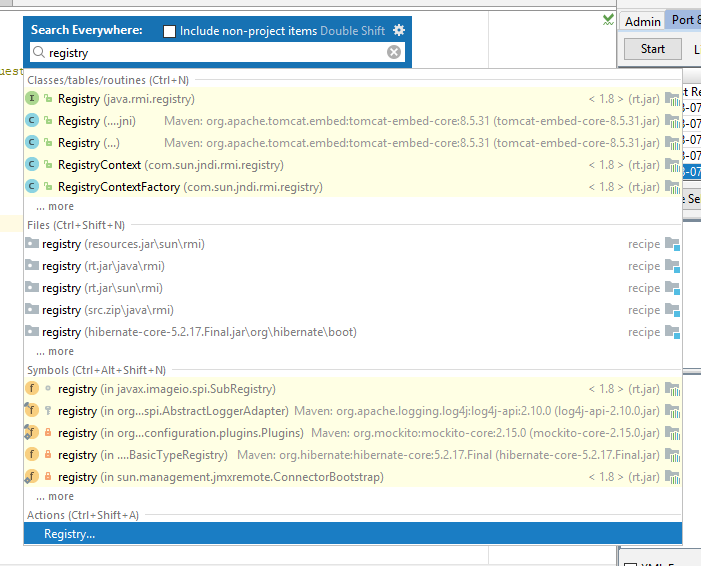
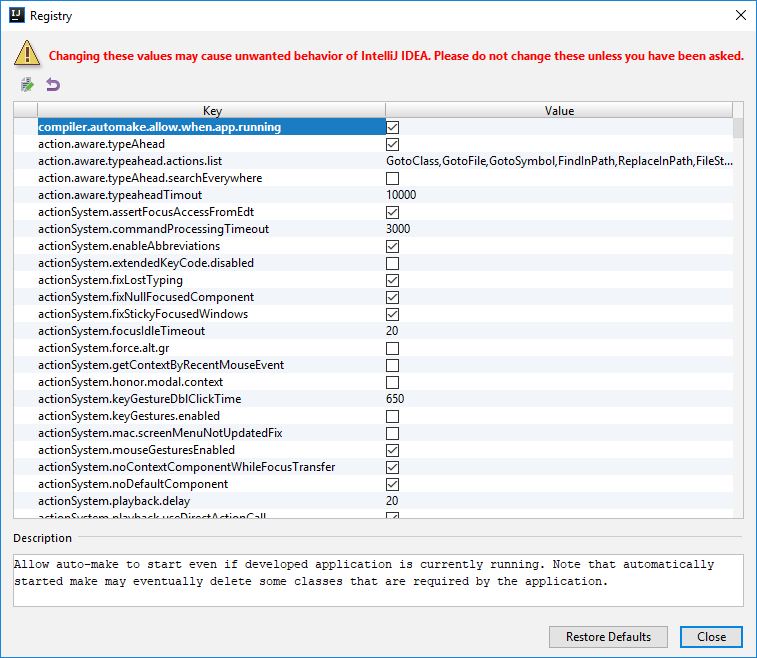
Keep the description in your mind in case you get into weird behaviour.
Close and now you are done.
As a software engineer deal withlot of programming languages and frameworks, but how the hell are you maintaining to remember everything you worked with? They key is practicing and making notes. Are you actually doing that? Of course you do, but I noticed I was lacking with it. During my work I'm working fulltime on projects where I mostly of the time write in Java. The idea is to start to create small applications in various languages to refresh my knowledge.
Create a small blog application with python using the flask framework.
Repo: python-blog
During the development I will add more steps.
On proxmox I was getting this error when connecting through SSH
perl: warning: Setting locale failed.
perl: warning: Please check that your locale settings:
    LANGUAGE = (unset),
    LC_ALL = (unset),
    LANG = "en_US.UTF-8"
are supported and installed on your system.
perl: warning: Falling back to the standard locale ("C").
Has to do with some locale that can't be loaded.
Fix:
Remove/Comment this line in /etc/ssh/sshd_config:
AcceptEnv LANG LC_*
Restart SSHD
Yep, Today was my day. Sometimes I forget to load my private key to connect with the server and I get rejected. This accumulates the authentication errors and ta da, I get locked out after the 3rd time. Denyhosts keeps track of the number of authentication attempts and adds the IP on the /etc/hosts.deny file.
DenyHosts is a script intended to be run by Linux system administrators to help thwart SSH server attacks (also known as dictionary based attacks and brute force attacks).
Bot's are scanning the internet and trying to make attempts to login. Take a look at your auth log file and you will see many attempts, with many I mean many PER SECOND!
When I take a look at my /etc/hosts.deny file I see my own IP. After removing my IP it will be put back with the next login attempt. What the hell?
Denyhosts stores the IP addresses also in these files listed below. Make sure you check them all and remove when necessary.
But first stop denyhosts using this command
#Stop
systemctl stop denyhosts.service

#Start
systemctl start denyhosts.service
/var/lib/denyhosts/hosts
/var/lib/denyhosts/hosts-restricted
/var/lib/denyhosts/hosts-root
/var/lib/denyhosts/hosts-valid
/var/lib/denyhosts/users-hosts
Protip:
Always disable password authentication in SSHD. Instead use public key authentication. It's more convenient and more secure. But be careful with your private key.
I was trying to get a readable output of a stored procedure in Oracle SqlDeveloper but the lines were truncated after 90 characters. The tool didn't had the option to change the linesize for the script output.
It was faster for me to write this in Java to get the readable output of the query.
This code will print the column names with the record values.
      ResultSet rs = getResultSet()
      while (rs.next()) {
        int columnCount = rs.getMetaData().getColumnCount();
        List<String> results = new ArrayList<>();
		//Columnindex is one based.
        for (int i = 1; i <= columnCount; i++) {
          String columnName = rs.getMetaData().getColumnName(i);
          String value = rs.getString(i);
          results.add(columnName + "=" + value);
        }
        System.out.println(results);
      }
Command to prepare svn to add your deleted files to commit:
svn st | grep ^! | awk '{$1=""; print " --force \""substr($0,2)"@\"" }' | xargs svn rm
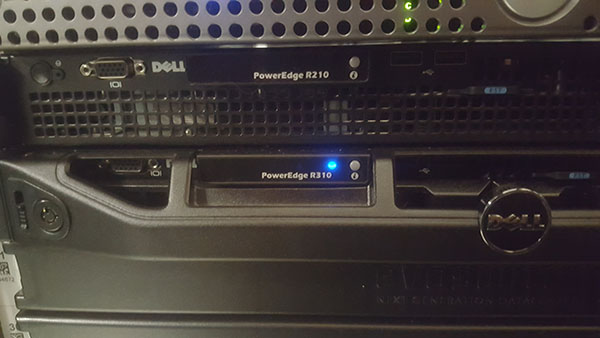
Yesterday I went to Evoswitch to find out why my other server was not reachable anymore. I tried to send a ACPI reboot signal from remote but the server didn't respond to it. I had that moment again that I could smash my head to my desk.
I have the following servers:
#Server 001
Dell R210 from 2010
#Server 002
Dell R310 from 2013
FAIL
When I installed the R310, I migrated completely from the R210. I also switched the IP address because of my mail server reputation. It's hard to build one up so it would be a waste not to use my old IP. So the R310 is configured as Server001 and the R210 is running as Server 002. I thought I was done but forgot 1 thing....THE POWER CABLES!.
If I send a reboot/shutdown signal from remote to Server 002(R210), the R310 was shutting down! FUCK!
Replacing the R210
I replaced my R210 with a R410 which I acquired from work with the following specs.
2x Intel Xeon E5640
12GB DDR 3 Ram
2x 500 GB
Dell PERC H700
2x Western Digital RE 500GB

I installed Fedora 25 with Docker to try some cool things out with Docker. It's cooler to run it on your own colocated server than in a VirtualBox on your workstation :D.
The nice thing about Fedora is that it runs on the newest packages so I don't have to mess around with 3rd party respo's which were required on CentOS. Running on bleeding edge release can have it's benefits or can even turn out very badly. But you can tell the same about the dependency hell you get by using 3rd party repositories.
The shared rack
Like you see it's a fucking mess. No not my hair, but the servers I'm talking about the servers hanging on 2 screws without rack rails. I mean this server could "crash" literally from the rack down.
You come to see things like Sitecom consumer switches connected to some PowerEdge/HP servers

It's running good now. Let's try the cool stuff now. Running on 16 cores baby!
When showing a DialogFragment the title is not visible when opening it on a small resolution or on a smartphone. This is the default behavior/styling of Android to preserve space for the content. In some cases you don' t want to hide the title because the user could miss the context of the dialog.
For example you have a dialog with a EditText and a submit button. It would be shown like this:
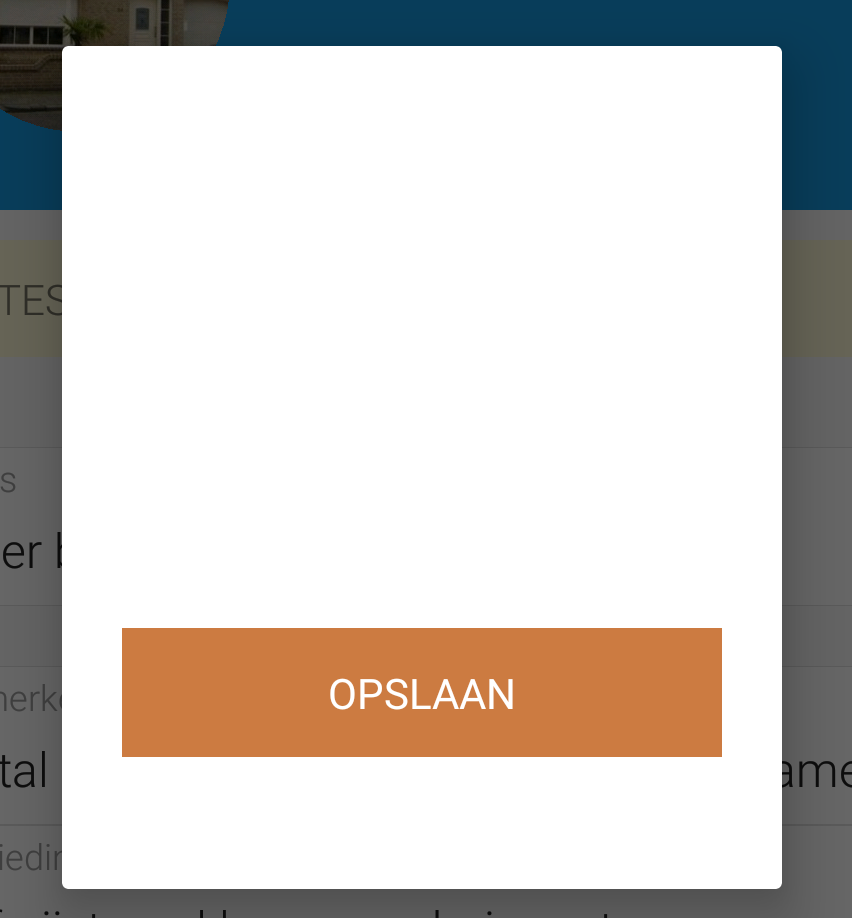
Well how the heck do I know what to fill in here?
Let' s show that title
Open styles.xml and add this style:
<style name="DialogWithTitle" parent="@style/Theme.AppCompat.Light.Dialog">
	<item name="android:windowNoTitle">false</item>
</style>
The naming of the android:windowNoTitle property is obscure. So if I would like to show the title, you to set it to false.
In your DialogFragment class you have to set the style:
	public static AlertTextDialogFragment newInstance() {
		AlertTextDialogFragment fragment = new AlertTextDialogFragment();
		fragment.setStyle(STYLE_NORMAL, R.style.DialogWithTitle);
		Bundle args = new Bundle();
		fragment.setArguments(args);
		return fragment;
	}
Tadaa, the title is always visible now.
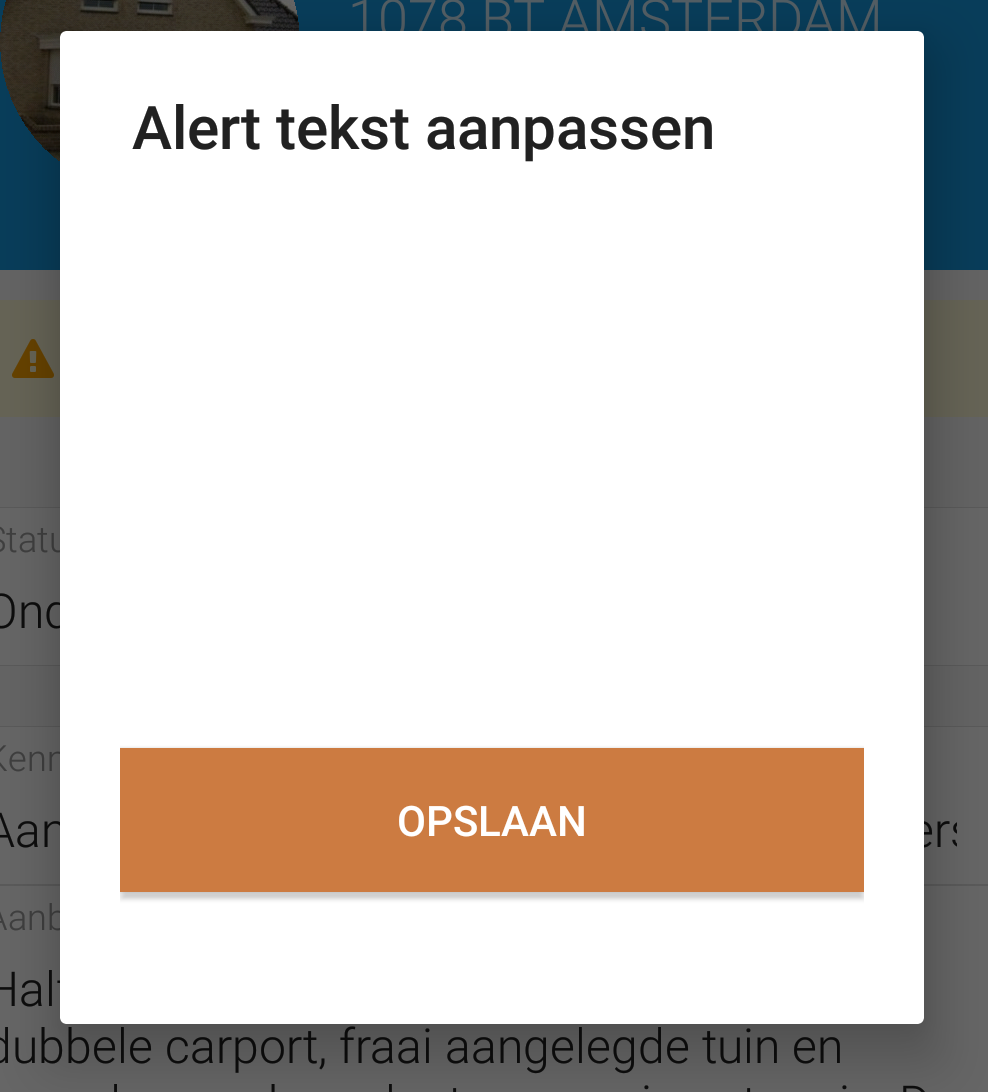
Protip:
If you have to create some kind of setting or boolean name, try to give it the positive name. In this case it could be clear if the name would be android:showWindowTitle.
Try to prevent these kind of names:
boolean disableChecks
boolean notShowing
boolean dontSave
A handy package to search through indexed files is mlocate which you will get bundled in a server or workstation installation of a Linux operating system.
The first time you will always get this error:
[root@puppetmaster manifests] locate "site.pp"
locate: can not stat () `/var/lib/mlocate/mlocate.db': No such file or directory
This means that the file mlocate.db is missing because the file index database has never been builded before.
Run this command to build the file index database:
[root@puppetmaster manifests] updatedb
You also can run this command to update the database.
Note that it could take a while to build the database.
Somebody at GNOME decided to make the second monitor to stay fixed when you switch workspaces. To enable the switching workspaces of the second monitor, change this gnome setting by running this command.
gsettings set org.gnome.shell.overrides workspaces-only-on-primary false
Note: With older versions of GNOME you may need to use gconf-editor.
In GNOME 3.8 you can switch workspace by using the Super + Page Up or Super + Page Down. Unfortunately you can do the same with Ctrl + Alt + Arrow Up or Ctrl + Alt + Arrow Down. The last one conflicts with a neat shortcut in Eclipse to duplicate lines.
Under Settings > Keyboard you will find the hotkey to switch workspaces. The Ctrl + Alt Arrow Up/Down is always bound and is not shown.
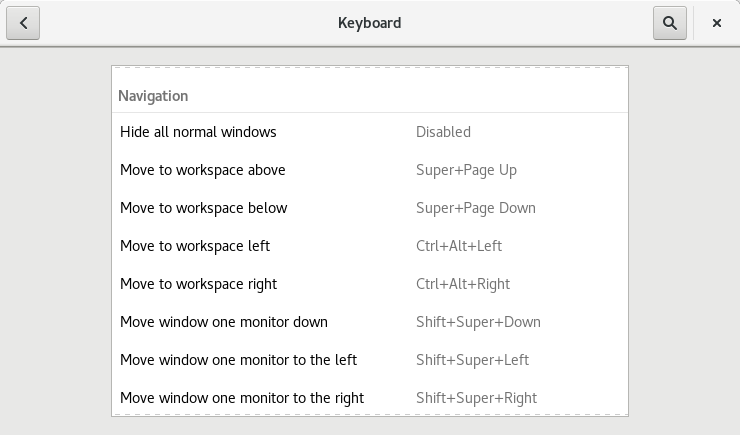
Check which keys are bound here:
gsettings get org.gnome.desktop.wm.keybindings switch-to-workspace-up
['<Super>Page_Up', '<Control><Alt>Up']

gsettings get org.gnome.desktop.wm.keybindings switch-to-workspace-down
['<Super>Page_Down', '<Control><Alt>Down']
You can clearly see that both commands have 2 hotkeys assigned.
To remove the Ctrl + Alt variant run this:
gsettings set org.gnome.desktop.wm.keybindings switch-to-workspace-down '["<Super>Page_Down"]'
gsettings set org.gnome.desktop.wm.keybindings switch-to-workspace-up '["<Super>Page_Up"]'
The hotkeys Super + Page Up and Super + Page Down are retained but Ctrl + Alt + Arrow Up and Ctrl + Alt + Arrow Down are removed.
Today I was trying to run a unit test in Android but for some reason it didn't work. It was a Doh! moment again
This was the message I got:
Process finished with exit code 1
Class not found: "xx.xx.xx"Empty test suite.
In Android there are two kinds of unit tests:
These tests have their own package with the same name as your identifier.
You would see this inside your java folder:
nl.orhun.myapp < -- source files
nl.orhun.myapp (androidTest) <-- instrumented test files
nl.orhun.myapp (test) < -- local unit test files
The advantage of local unit testing is that you don't have the overhead to need to run a virtual device. It just simply can run on your computers JVM. Unfortunately you can't make use of Android framework features. So this will only be handy to test your own code which is not Android framework dependent.
Initially I created a local unit test and ran it. After that I moved the class to the androidTest to make it a instrumented test
Because I ran it before, it remembered my last run configuration. The next time I ran the LoginTest, it tried to run is as a LocalTest while the test is inside androidTest package which gave this error.
So, when you move a unit test from a local test to androidTest, check your Run/Debug settings. In my case I could remove the configuration so the next time a new one is generated again.
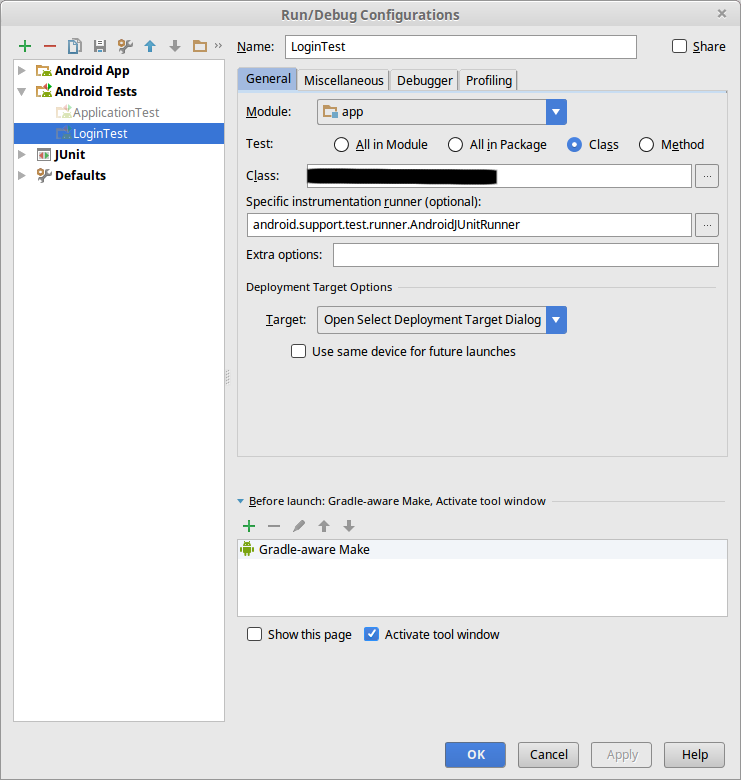
All your androidTest configurations are under AndroidTests. The local unit tests are under JUnit.
When using linux or OSX your SVN credentials are saved under your user profile.
This happens when you use a IDE or using svn from commandline.
This message is shown then:
-----------------------------------------------------------------------
ATTENTION!  Your password for authentication realm:

   <https://domain.tld> Staff only

can only be stored to disk unencrypted!  You are advised to configure
your system so that Subversion can store passwords encrypted, if
possible.  See the documentation for details.

You can avoid future appearances of this warning by setting the value
of the 'store-plaintext-passwords' option to either 'yes' or 'no' in
'/home/gokhan/.subversion/servers'.
-----------------------------------------------------------------------
Store password unencrypted (yes/no)? yes
Like it says, SVN stores your username and password in plain-text inside your user profile.
To remove all stored SVN username and passwords:
rm ~/.subversion/auth/svn.simple/*
The contents of a credential file looks like this:
K 8
passtype
V 6
simple
K 8
password
V 7
<mypassword>
K 15
svn:realmstring
V 41
<https://domain.tld> Staff only
K 8
username
V 6
<myusername>
END
Today I wanted to create a AttachmentMenuDialog which will be reusable in an Activity or Fragment. Like the name says, it's a DialogFragment which will be used to add file attachments to your Activity/Fragment.
In the image below you see that I have two Activities who are opening the AttachmentMenuDialog. The only difference is that ActivityOne is opening the fragment directly and ActivityTwo is opening from another fragment.
I struggled with the problem that it worked in one of the both Activities. So when I fix it for ActivityOne, it broke at ActivityTwo and vice versa.
.png)
Inside AttachmentMenuDialog I have three buttons:
Adding a file from storage and taking a picture was no problems at all, but getting the PDF document as a result from the PDFActivity was not so easy as it should be.
On the PDF button I had this onClickListener:
AttachmentMenuDialog.java:
pdfButton.setOnClickListener(new View.OnClickListener() {
	@Override
	public void onClick(View view) {
		Intent intent = new Intent(getContext(), PDFActivity.class);
                //REQUEST_CODE_PDF = 1234
		startActivityForResult(intent, REQUEST_CODE_PDF);
	}
});
This should work like expected you think? Well it's not. Not on this way at least. The PDFActivity is opened, and when I create a PDF, I would like to have the result back inside my Activity. Like the scheme above I would like to have the PDF document inside ActivityOne or ActivityTwo.
The problem is that when you open the activity by using the fragments startActivityForResult, you will lose the requestCode. Your activity regenerates a new one and you will never ever, ever get your result back. After running the debugger I found out that the requestCode is always changed to the number 65660. Don't ask me why.
Solution:
You have to start the Activity from your parent activity like this:
getActivity().startActivityForResult(intent, REQUEST_CODE_PDF);
When the PDFActivity is finished, it will execute onActivityResult() from the parent Activity. You will have to delegate it to your fragment if you need it there.
ActivityOne.java
@Override
public void onActivityResult(int requestCode, int resultCode, final Intent data) {
	if (attachmentMenuDialog != null) {
		attachmentMenuDialog.onActivityResult(requestCode, resultCode, data);
	}
}
Well the first problem is solved. My PDF document from PDFActivity is passed to my Activity where I expect it, but like I'm not frustrated enough, I faced a new problem. Why the heck is my Activity(ActivityOne) closing when I create my PDF inside PDFActivity?
In ActivityOne and in ActivityTwo the PDFActivity returned the PDF document inside the onActivityResult method. For some reason ActivityTwo finished/closed automatically when PDFActivity was finished.
Let's take a look at the PDFActivity where I finish the activity
public static final int RESULT_PDF_OK = 5;

public void onTaskComplete(File pdfFile) {
	Intent intent = new Intent();
	intent.putExtra(INTENT_PDF_FILE, pdfFile);
	setResult(RESULT_OK, intent);
	finish();
}
The problem is that I was putting RESULT_OK as status code which is an reserved status for internal usage. Android uses resultcodes untill 1 for internal usage. Like RESULT_OK = -1. For your own purposes you can safely use custom resultCodes which are bigger than 1.
I think that because I opened the whole Fragment/Activity chain by using getActivity().startActivityForResult() that I passed the context of my Activity to the PDFActivity which unintentionally finishes the Activity because the result is RESULT_OK.
Managing your linux machine from remote is a great thing, but you shouldn't allow root to logging in from SSH. Or at least when it's reachable from outside. There are anonymous groups active who will beat you up when when you allow this. Naah just a joke, I will beat you up personally. Or you could read this article.
Everyone knows that every Linux operating system has a user called 'root' who can do anything in the system. Root is the root. It can even take your dog away for a walk!
Because everyone knows that this user exists, they only need to guess the password to break in to your system by doing a brute force attack. So someone starts some script or bot who will do continuously login attempts with generated passwords. So the first thing you need to do is disallowing root access. Or even better, have a white list with IP addresses where you will allow SSH connections from. Or if this is not an option, just block IP addresses where many unsuccessful login attems are made.I will write an article about that too but in the meanwhile take a look at DenyHosts.
Open the sshd_config file:
sudo vim /etc/ssh/sshd_config
Look for this line:
#PermitRootLogin no
After a clean install you would see that this line is usually commented. This means it will use the default value with is be YES. So having this line commented means that you will allow root login. Holy shit bro, look out I might stand behind you with a baseball bat!
Just change this line into:
PermitRootLogin no
Restart sshd to apply the changes:
sudo /etc/init.d/sshd restart
So how are you supposed to login now? You need to have a normal user with administrator rights or adding the user into sudoers by using visudo. Don't edit the /etc/sudoers file directly. Just do it with visudo because it will validate the changes you have done. if you screw this up, then sudo is not working properly.
If you are upgrading your machine from Debian Wheezy to Jessie, then you will find out that there is no IP forwarding anymore. In my case I was upgrading my Proxmox 3.1 to 4.2 and masqerading with iptables. So having 1 public address for multiple virtual machines.
You have to check your /etc/network/interfaces and add this line:
post-up echo 1 > /proc/sys/net/ipv4/ip_forward
This enables ip forwarding.
Should look like this:
auto lo
iface lo inet loopback

auto eth0
#real IP adress
iface eth0 inet static
        address  192.168.10.2
        netmask  255.255.255.0
        gateway  192.168.10.1

auto vmbr0
#private sub network
iface vmbr0 inet static
        address  10.10.10.1
        netmask  255.255.255.0
        bridge_ports none
        bridge_stp off
        bridge_fd 0

        post-up echo 1 > /proc/sys/net/ipv4/ip_forward
        post-up   iptables -t nat -A POSTROUTING -s '10.10.10.0/24' -o eth0 -j MASQUERADE
        post-down iptables -t nat -D POSTROUTING -s '10.10.10.0/24' -o eth0 -j MASQUERADE
I had to modify the hosts file on a Windows 10 machine, but the changes were ignored all the time. It took me literally 1 hour to found out why it didn' t work. The client PC was running Windows 7 before and upgraded to Windows 10. He had 2 windows folders.
Usually I navigate to this folder by typing it in the file explorer:
C:\Windows\System32\drivers\etc
The host file was indeed located here. But the changes did not affect. The problem was that there were multiple Windows directories so this one was unused.
To make sure that you will always get the proper hosts file, go to this location by using the %SystemRoot% environment variable:
%SystemRoot%\System32\drivers\etc\hosts
For more generic information about the hosts file, visit this Wikipedia article.
It took me 8 hours to solve this problem. I was creating a custom view that extends LinearLayout and having a RecyclerView as child. The problem was that RecyclerView didn't measured correctly so the width and height stayed on 0dp. The RecyclerView was never visible.
While trying some tricks and hacks to measure the RecyclerView, I've found out that this was just an Android bug that's fixed on februari 25, 2016. RecyclerView was ignoring the layout params such as WRAP_CONTENT and MATCH_PARENT.
Upgrade the RecyclerView dependency at least to this version:
compile 'com.android.support:recyclerview-v7:23.2.0'
Also take a look at this article about Android Support Library 23.2.
Happy programming all!
When you are creating your awesome Android app, you'll make use of the awesome Android libraries like listed on this page.
Sometimes you will face the problem that you want to add some behaviour to some component like a View.
I had the following problem: I was using Android material chips library, but I needed to do something when the user lost focus of the EditText. I have managed to get the EditText view instance by using View.findViewById(), but the library already had implemented OnFocusChangeListener. If I set my own OnFocusChangeListener implementation, then I will break the functionality of the library. So I had to find an alternative way to detect the focus/blur event.
You can do it with the following code:
ViewTreeObserver viewTreeObserver = getViewTreeObserver();
viewTreeObserver.addOnGlobalFocusChangeListener(new ViewTreeObserver.OnGlobalFocusChangeListener() {
    @Override
    public void onGlobalFocusChanged(View oldFocus, View newFocus) {
        //oldFocus could be null
        if (oldFocus == null || !oldFocus.equals(myEditText)) {
            return;
        }
        doYourThing();
    }
});
Just don't forget to check if the oldFocus is null or not, or else you will get a NPE.
Focus on a EditText and move the cursor end of the last character.
EditText editText = (EditText) findViewById(R.id.myEditText);
editText.requestFocus();
editText.setSelection(editText.getText().length());
Let Android open a file in an app that can handle the file, like opening a PDF in Adobe Reader. Or opening an image in your photo viewer.
Determine the mimetype by file extension:
public static String getMimeType(String filename) {
    String type = null;
    String extension = MimeTypeMap.getFileExtensionFromUrl(filename);

    if (extension != null) {
        type = MimeTypeMap.getSingleton().getMimeTypeFromExtension(extension);
    }
    return type;
}
Let Android open the file by finding the right app for it. It throws an unchecked ActivityNotFoundException if there could not be found an app that can handle this file.
public static void openIntent(Context context, File file, String mimeType) {
	String mimetype = mimeType;
	Intent myIntent = new Intent(android.content.Intent.ACTION_VIEW);
	myIntent.setDataAndType(Uri.fromFile(file), mimetype);
	try {
		context.startActivity(myIntent);
	} catch(ActivityNotFoundException e) {
		Toast.makeText(context, "No app found for this file type.",
				Toast.LENGTH_SHORT).show();
	}
}
Use it like this:
//The file you want to open
File file = new File("/somedir/somefile.png");

//Get the mimetype of the file
String mimeType = getMimeType(file.getName());

//Open the file in a new Activity
openIntent(getContext(), file, mimeType);
To vibrate your Android device programatically use the code below. The 1000 stands for a duration of 1000 milliseconds.
((Vibrator)getSystemService(VIBRATOR_SERVICE)).vibrate(1000);
Don't forget to add the required permission to your AndroidManifest.xml file:
<uses-permission android:name="android.permission.VIBRATE" />
Creating a SPA containting multiple pages/views would require the use of a router like ui-router. The only thing about ui-router is that the documentation is kinda messed up. I will explain how to pass parameters between multiple views.
When you switch between states in your Angular app, you will sometimes need to pass some parameters to the state you want to enter. Mostly you will pass some kind of a number that stands for the primary key of the entity you are trying to show.
In the code below you see an state that requires a personId as a param. The url of the state contains a placeholder where the personId param is expected.
If you would go to the URL /person/1337/ or calling ui-sref="person.detail({personId:1337})" or even calling $state.go("person.detail", {personId: 1337}), then the personId can be acquired by calling $stateParams.personId. Keep in mind that you could get a string value.
$stateProvider
   .state("person.detail", {
		url: "/person/:personId/",
		templateUrl: "templates/personDetail.html",
		controller: "PersonDetailController"
	});
Let's come to the next part. Sometimes you want to pass some object as param. UI-router allows that, but you need to define the param first in your state.You can't just pass randomly params until you have defined them. These parameters are optional and have their initial value.
$stateProvider
   .state("person.detail", {
		url: "/person/:personId/",
		templateUrl: "templates/personDetail.html",
		controller: "PersonDetailController",
                params: {
                    dateOfRequest: new Date(), //inital default value
                    manager: null //Null  as initial value but yet is defined
                }
	});
In the code above I have defined the params dateOfRequest and manager. These parameters must have a initial value. If you really don't need a initial value, then you can set the parameter value on null.
This is the way how we pass the params now:
$state.go("person.detail", {personId: 1337, dateOfRequest: getDate(), manager: getManager()});
Same story if you use ui-sref:
ui-sref="person.detail({personId:1337, dateOfRequest: getDate(), manager: getManager()})"
In the controller of the state you want to switch you can fetch the parameter like this:
.controller("PersonDetailController", function($scope, $stateParams) {
    $stateParams.personId;
    $stateParams.dateOfRequest;
    $stateParams.manager;
});
The last way to pass value between controllers, states, views is using the Angular service. A service is only instantiated once and it's reference is shared.
Angular services are:
- Lazily instantiated – Angular only instantiates a service when an application component depends on it.
- Singletons – Each component dependent on a service gets a reference to the single instance generated by the service factory.
If you would like to swap the position items in a javascript array use this code:
var items = ["foo", "bar"];

function changeOrder(posA, posB) {
    var itemA = items[posA];
    var itemB = items[posB];

    items[posA] = itemB;
    items[posB] = itemA;
}

changeOrder(0,1);

console.log(items.join(",")) // will output "bar,foo"
Provide search engines and crawlers useful rich information about your website by specifying Open Graph tags in your meta tags. The Open Graph protocol has been developed by Facebook and it's used by itself.
The common OG tags are:
<meta property="og:title" content="Blog about software development by Gökhan Orhun." /> <meta property="og:site_name" content="Orhun.nl software development & websites" /> <meta property="og:image" content="https://orhun.nl/img/fb_og_image.png" /> <meta property="og:url" content="https://orhun.nl" /> <meta property="og:description" content="Blog about software development by Gökhan Orhun." />
If you share this website on Facebook or Whatsapp, then you would see this:
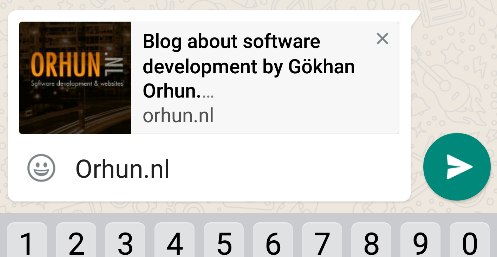

Find more OG tags on http://ogp.me/
To debug your website for the Open Graph tags, use the Facebook Debug Tool.(you should probably log in first).
Paste your URL in the field and press "Debug". The first time you debug, the scraper shows the cached data. You should press "Fetch new scrape information". This is also the way to clear the cache of the given URL.
Encryption is getting importanter now because the internet has grown alot. We have internet everywhere. Even in our pockets. There are whole companies who are based to provide service on the internet. It's kinda weird that these companies are selling something you can't hold in your hands.
When you are trying to visit a website, your web browser is establishing an connection with the web server by using the HTTP protocol. This happens by establishing a plain text connection.
Using an unencrypted, plain text connection is not a big deal for normal websites where there are no personal data stored onto it, like this site. Important services like internet banking, web e-mail clients or a payment service require the use of an encrypted connection.
The dangers of using a unencrypted HTTP connection:
An encrypted connection prevents that any interceptor can read the data. If someone would use a network sniffer, the connection will be shown but all the data is encrypted.
BadSSL.com, check if your browser accepts invalid, insecure certificates.
Test your website or servers supported encryption. This site also tests your server for vulnurabelities.
https://www.ssllabs.com/ssltest/
Mozilla has launched a free service to generate your own TLS certificate
It all started on my hobby barebone server. My goal was to learn setting up an webserver and to create some hobby websites on it. As a student, I bought an Asus Terminator T2-P deluxe.
The Asus Terminator T2-P deluxe had the following specs:

After my home server got hacked due to crappy security(who the hell allowes remote access to webmin), my server became a member of an botnet. This lasted a few days until my ISP disconnected me and send me a letter. The letter stated that there were illegal activities from my IP and that's why they kicked me off the internet.
It was time to try the real deal: FreeBSD. My first introduction to linux was FreeBSD. When I look back, it was the hardest distro ever, but it was the best way to start learning about UNIX systems. It took me around 4 reinstalls to learn about things I should do better the next time. I was running a Postfix mailserver with an open relay. There were around 40k mails send each day.
The next step into the UNIX systems was running CentOS. Like FreeBSD I was running Apache, PHP, Postfix, MySQL and Bacula on the same operating system. This setup wasn't reliable because as soon as one component crashes, everything crashes.
It became time to go enterprise. In 2010 I bought a Dell PowerEdge R210 with the following specs:
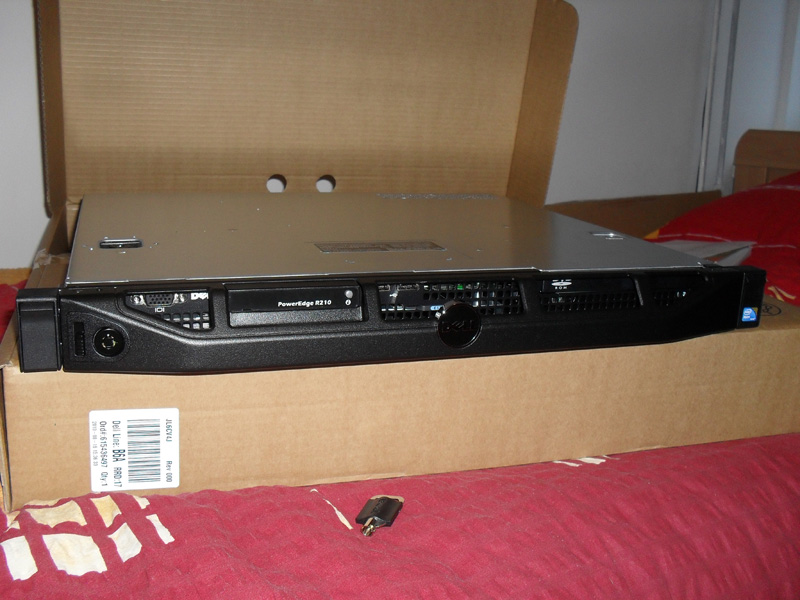
Colocated at Leaseweb at datacenter Evoswitch in Haarlem

After a year running CentOS colocated, I was interested in virtualisation. I've read about it and everyone talked about it like it was the answer to the meaning of life. Hell yeah, it was.
The first hypervisor I tried was ESXI. I bought a second hand Dell PowerEdge 1850 with 2x SCSI 72GB disks to try some things with ESXI. I became deaf with the server running in my room. There were also problems with the drivers. Because the PE 1850 was kinda old, I was forced to use an older version of ESXI and wasn't happy with the lack of a web interface. I sold the PE 1850.
Next thing I tried was Proxmox. This was the thing I was looking for: an opensource Debian based bare metal hypervisor. I couldn't install it on my colocated PowerEdge R210 because my mail and websites were running on it, so I made the decision to buy another Dell server.
The new Dell PowerEdge R310 server specs:
Well, the server was up and running Proxmox with 4 virtual machines and faced to next problem: the datacenter gave me 1 public IP. I have managed to make all virtual machines reachable behind 1 public IP.
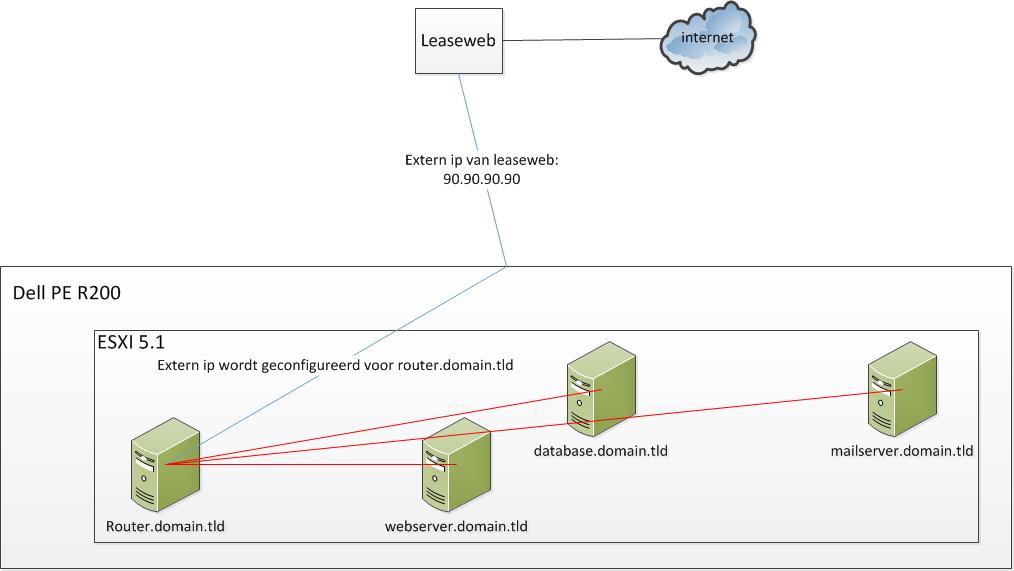
The solution was using an virtual internal network between the virtual machines and Proxmox was configured to bridge incoming connections to the virtual firewall/router. This process is called NAT(Network Address Translation) and Masquerading.
All other virtual machines are behind the firewall/router. If the virtual machine running firewall/router is shut down, then all the underlying virtual machines are not reachable. Sounds secure to me. Every virtual machine I am running, has it's own responsibility. Like I said, running multiple 'servers' on one operating system is not reliable. So I have virtual machine running only apache, the other vm is running MySql etc.
Well, I like to learn about managing my own server so I can do whatever I want. The only advantage you have with VPS is that you don't need to worry about the hardware of your server. If something gets broken, then it isn't your responsibility anymore.
VPS mostly have a limited choice of operating systems. Like I said before, It's not reliable to give one server/operating system many responsibilities.If you want to install a webserver, database and a mailserver on three seperate VPS'you will pay at least around €100,-.
Javascript is getting more popular now while it could be a nightmare to code it. There is an uncontrollable growth in javascript frameworks to make your development progress easier so you can create code in less time. In this article I will explain how to start with AngularJs.
AngularJs
AngularJs is an open source javascript framework created by Google and is maintained by Google and the open community of individual developers. Check the wiki for more info about AngularJs.
The framework is user friendly to develop with and runs client side in the web browser. It also uses the MVC pattern so the presentation layer is separated with the data and logic.
Lets begin!
You have to run a webserver like Apache on your PC. There are easy all-in-one packages (for Windows) to setup apache like XAMPP or WAMP (I don't have to tell you that you must not use these webservers for production right? :)). Or you could use a nodejs webserver.
Create the index.html:
<!DOCTYPE html>
<html>
	<head>
		<title>Getting started with angular</title>
		<script src="/bower_components/angularjs/angular.min.js"></script>
		<script src="/js/app.js"></script>
		<script src="/js/controller.js"></script>
	</head>
	<body ng-app="angularApp" ng-controller="MainController">

	</body>
</html>
Create the js/app.js:
var angularApp = angular.module("angularApp", [
	"angularControllers"
]);
Create the js/controller.js:
var angularControllers = angular.module("angularControllers", []);

angularControllers.controller("MainController", function() {
	console.log("Main");
})
Well, this was quite easy huh? If you run this code, you have a single page with a controller. Let's add some pages and navigations.
There are two options for navigations: angular $route, and a commonly used third party library UI-router. If you wish to have a simple page navigation, then the build in angular $route is enough. If you want more advanced navigation with nested views and states, then use UI-router. In this example we will be using UI-router.
You will have to download the UI-router library and include it in index.html. I am using bower package management for my web libraries, even for angular.
Bower has also a dependency management system ex: if your fubar["1.2" ] library requires at least jQuery["1.10"], then fubar 1.2 will be installed with jQuery 1.10. Pretty cool huh? Take another coffee with the time you've saved!
Just take a look at it if you have time. For this example you could skip the bower part and just download UI-router library.
Include the angular-ui-router.min.js in index.html and add the <ui-view> directive inside the <body> tag.
index.html
<!DOCTYPE html>
<html>
    <head>
        <title>Getting started with angular</title>
        <script src="/bower_components/angularjs/angular.min.js"></script>
        <script src="/bower_components/angular-ui-router/release/angular-ui-router.min.js"></script>
        <script src="/js/app.js"></script>
        <script src="/js/controller.js"></script>
    </head>
    <body ng-app="angularApp" ng-controller="MainController">
        <ui-view>
        </ui-view>
    </body>
</html>
The <ui-view> directive decides that the content from the page states will be rendered here.
Inside your app.js we need to load the module "ui-router" and add the page states configuration.
js/app.js:
var angularApp = angular.module("angularApp", [
	"angularControllers",
	"ui.router"
]);
angularApp.config(function($stateProvider, $urlRouterProvider) {
	$stateProvider
	.state("homepageState", {
		url: "/home/",
		templateUrl: "templates/homePage.html",
		controller: "HomePageController"
	})
	.state("myOtherStateName", {
		url: "/secondPage/",
		templateUrl: "templates/secondPage.html",
		controller: "SecondPageController"
	});
	$urlRouterProvider.otherwise("/home/");
});
This still sounds easy right? Well, it is! We have done the following things:
Every state has his state name(we will come back later to this), an URL to map the browser URL, and a controller. There are more advanced options. Check the ui-router wiki. You could even delay the page navigation. state loading until some requested remote data is loaded, but that's out of the scope for this article.
In this example we will be using a basic page with an controller behind it.
js/controllers.js
var angularControllers = angular.module("angularControllers", []);

angularControllers.controller("MainController", function($scope) {
	$scope.callTheMain = function() {
		console.log("What's up?!");
	}
});
angularControllers.controller("HomePageController", function($scope) {
	$scope.callTheMain();
	$scope.title = "This is the homepage";
});
angularControllers.controller("SecondPageController", function($scope) {
	$scope.title = "The secondpage";
});
Angular controllers supports inheritance. In index.html there is the <body ng-controller="MainController">. Every controller inside <body> inherits "MainController". In this case if the current state is "homepageState", we have a controller named "HomePageController" who automatically inherits"MainController".
So basically like this:
<div ng-controller="ParentController">
        <div ng-controller="SomeChildController"></div>
</div>
"SomeChildController" can call "ParentController" but "ParentController" cannot access "SomeChildController"
Lets create the state templates
templates/homePage.html
<div>{{title}}</div>
<br />
<div>Go to the <a ui-sref="myOtherStateName">next</a> page.</div>
templates/secondPage.html
<div>{{title}}</div>
<br />
<div>Go back to home <a href="#/home/">page</a>.</div>
<br />
<label>Modify the title!</label>
<input type="text" ng-model="title"/>
You should have noticed the two difference in the templates. In homePage.html we use the ui-sref="myOtherStateName" to create a link to secondPage.html. This is the proper way to create links to different states. So if you want to change the URL's to these states, you only have to change the url property in app.js.
The ui-sref also works on other html tags like <div ui-sref="myOtherStateName">link</div>.
In secondPage.html we have used the plain <a> which is self explanatory.
Template compilation
Both templates contain {{title}} expression. Angular compiles the template and replaces the {{title}} expression with the value of $scope.title from the controller. This also could be a function call :{{getTitle()}}.
AngularJS provides two-way databinding support. If you write text in the input field in secondPage.html, the value in $scope.title changes synchronously.
So far so good, we have an AngularJS application with page navigation. Lets see what we can do with services and factories
Create js/services.js
var angularServices = angular.module("angularServices", []);

angularServices.service("MyService", function() {
	this.helloWorldMe = function(myName) {
		return "Hello world " + myName;
	}
});

angularServices.factory("PetFactory", function() {
	return {
		createPet: function(myPetName) {
			return "Oh hello " + myPetName + "!";
		}
	}
});
The main difference between a service and a factory is explained in this thread on StackOverflow.
Summarized:
Add the services module to your app like you did before:
js/app.js
​var angularApp = angular.module("angularApp", [
	"angularControllers",
	"angularServices",
	"ui.router"
]);

angularApp.config(function($stateProvider, $urlRouterProvider) {
	$stateProvider
	.state("homepageState", {
		url: "/home/",
		controller: "HomeController",
		templateUrl: "templates/homePage.html",
		controller: "HomePageController"
	})
	.state("myOtherStateName", {
		url: "/secondPage/",
		templateUrl: "templates/secondPage.html",
		controller: "SecondPageController"
	});
	$urlRouterProvider.otherwise("/home/");
});
Add the service "MyService" and factory "PetFactory" into our controllers and execute the functions.
js/controllers.js
var angularControllers = angular.module("angularControllers", []);

angularControllers.controller("MainController", function($scope) {
	$scope.callTheMain = function() {
		console.log("What's up?!");
	}
});
angularControllers.controller("HomePageController", function($scope, MyService) {
	$scope.callTheMain();
	$scope.title = "This is the homepage";

	console.log(MyService.helloWorldMe("Gokhan"));
});
angularControllers.controller("SecondPageController", function($scope, PetFactory) {
	$scope.title = "The secondpage";

	console.log(PetFactory.createPet("Bob"));
});
Now you can reuse your code by using services and factories.
I will post more articles about filters and directives.
Finally:
System.out.println("Hello world");
After few years "under construction", my website is finished at last! Just give me some time to write some blog articles.
For years I have been struggling with people asking me if I have my own website when I tell them that I'm a developer. Well, here it is.